7 Creative Summer DIY Ideas You Haven't Tried Yet
Bring a little fresh summer charm into your home with seven creative DIY projects that make the most of what you already have! From repurposing old wooden frames to adding beautiful handmade touches with flowers, fabric, and vintage finds, these simple ideas are all about giving forgotten treasures a second life.
With a little creativity and a few natural materials, you can create a warm, inviting home that feels effortlessly beautiful all summer long — without spending a fortune.
Vintage Window Herb Drying Rack
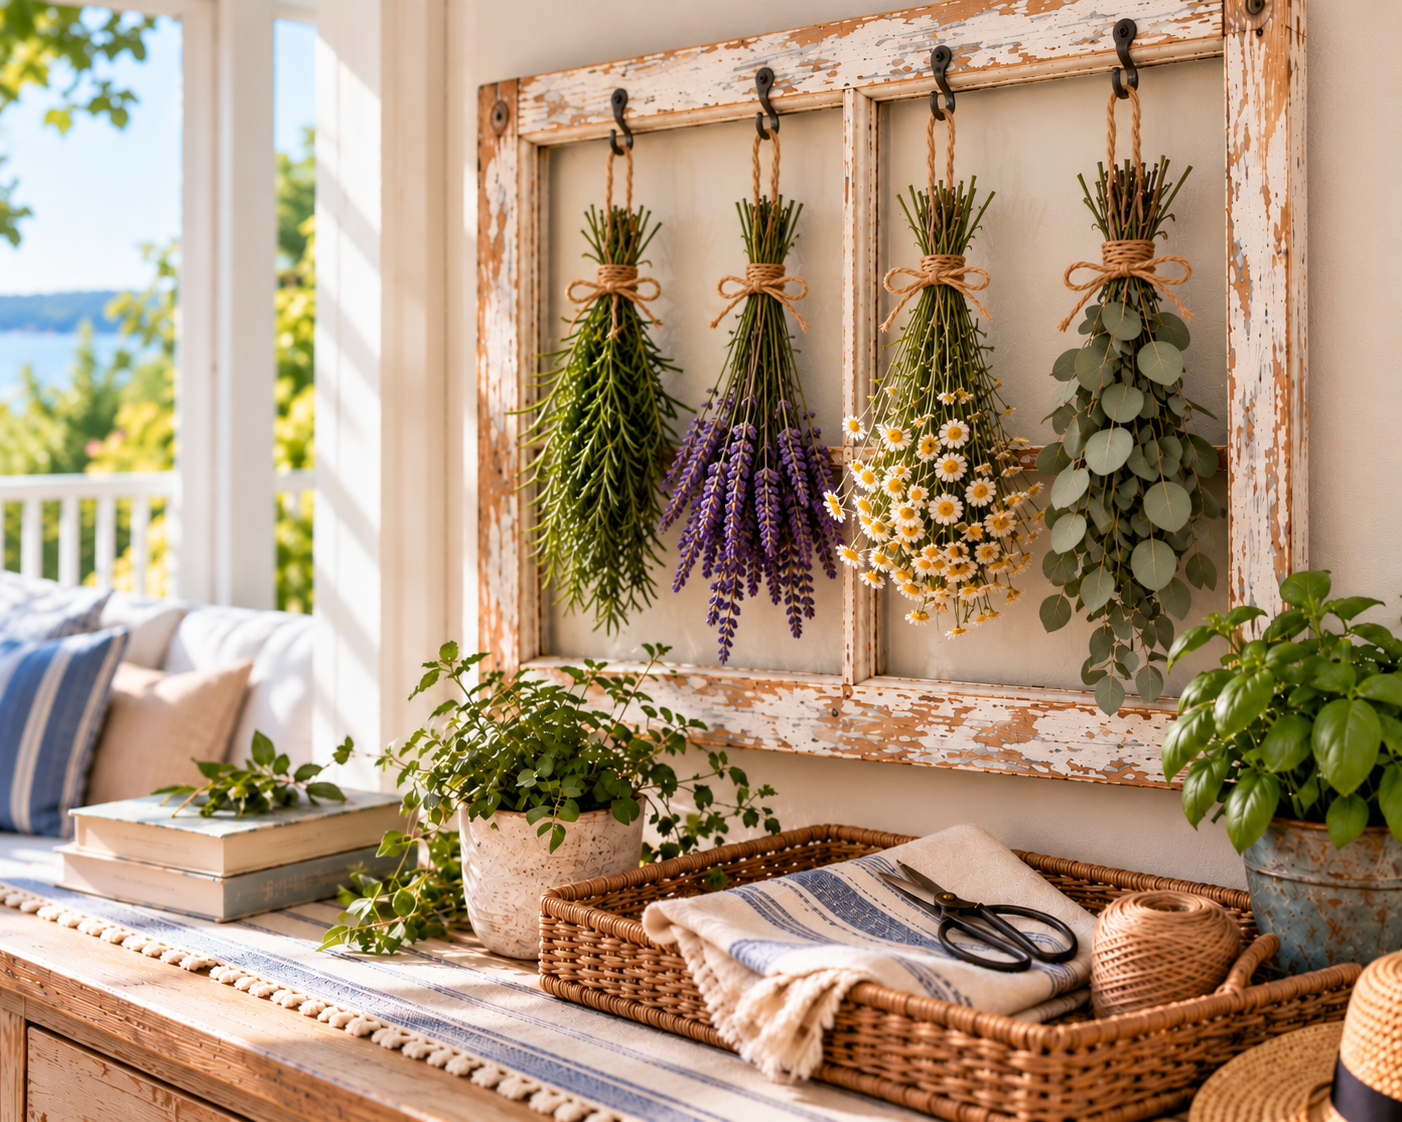
Give an old wooden window frame a beautiful second life by turning it into a charming farmhouse-style herb and flower drying rack. It's a simple way to bring a little garden beauty indoors while repurposing something you might already have.
Materials You’ll Need
- An old wooden window frame (without glass)
- 4 small screw-in hooks
- Natural jute twine
- Fresh rosemary
- Fresh lavender
- Fresh chamomile
- Fresh eucalyptus branches
- Sandpaper
- Wall-mounting hardware suitable for the frame and wall
How to Make It
Start by removing any remaining glass and gently sanding the rough edges of your wooden frame. If the frame has old paint, check that it's lead-free before sanding.
Attach four small hooks evenly along the top of the frame. Gather the rosemary, lavender, chamomile, and eucalyptus into separate bundles, tying each securely with natural jute twine.
Hang the bundles upside down, leaving enough space between them for air to circulate. Securely mount the frame in a dry, well-ventilated area away from direct sunlight.
For herbs you plan to use in cooking, choose edible varieties and keep them away from old painted surfaces.
Summer Fabric Scrap Flower Art

Turn leftover fabric scraps into a beautiful handmade floral artwork! This charming cottage-style project gives old shirts, pillowcases, and vintage linens a second life while adding a soft, personal touch to your home.
Materials You’ll Need
- An old wooden picture frame (without glass)
- Natural linen fabric for the background
- Cotton fabric scraps in blue gingham, cream, red floral, blue-and-white stripes, and dark blue
- 5 small wooden buttons
- Green fabric scraps for leaves
- Thin, dry twigs for flower stems
- Natural jute twine
- Fabric scissors
- Needle and thread
- Fabric glue or a low-temperature hot glue gun
- Sturdy cardboard for backing
How to Make It
Start by covering a sturdy piece of cardboard with natural linen, folding and securing the edges neatly on the back.
Cut your fabric scraps into several layers of rounded petals. Gently fray the edges to create a soft, textured look. Gather and stitch the layers together to form five flowers, then sew a wooden button into the center of each one.
Use a different fabric pattern for each flower: blue gingham, cream, red floral, blue-and-white stripes, and dark blue.
Cut small leaves from green fabric and arrange them around the flowers. Position thin, dry twigs beneath the blooms to create natural-looking stems.
Arrange the five flowers into a small bouquet on the linen background. Once you're happy with the placement, carefully secure the flowers, leaves, and stems using fabric glue or a low-temperature hot glue gun.
Gather the stems together near the bottom and finish with a simple natural jute bow.
Place your finished artwork inside the wooden frame without glass to preserve its beautiful three-dimensional texture.
Thrifted Pitcher Flower Arrangement
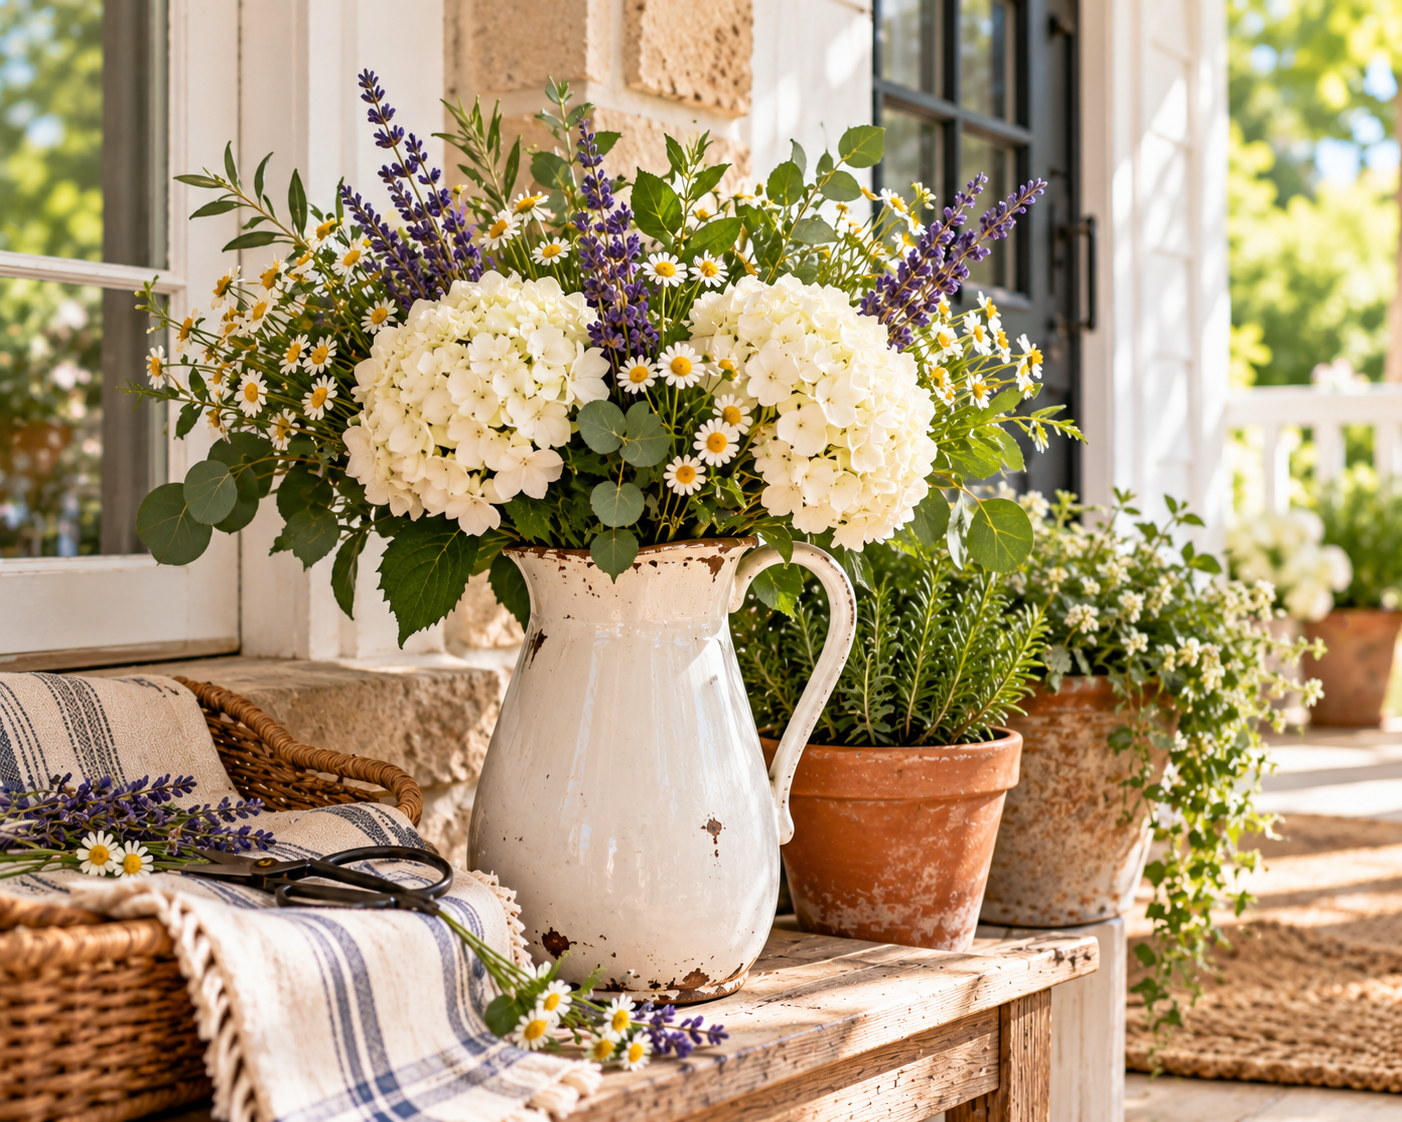
Give an old pitcher a beautiful second life with a fresh summer flower arrangement! A weathered white pitcher, soft garden blooms, and a few sprigs of greenery are all you need to create a charming farmhouse centerpiece without buying an expensive new vase.
Materials You’ll Need
- An old white ceramic pitcher with a handle
- Fresh white hydrangeas
- White daisies with yellow centers
- Fresh purple lavender
- Eucalyptus branches
- Assorted fresh garden greenery
- Garden scissors or pruning shears
- Clean water
How to Make It
Start by cleaning your thrifted pitcher thoroughly. Make sure it's watertight before filling it with fresh, cool water.
Trim the flower stems at an angle and remove any leaves that would sit below the waterline.
Begin with the white hydrangeas, arranging them toward the front and center of the pitcher to create a soft, full base.
Add small white daisies throughout the arrangement, allowing their delicate blooms to peek between the larger hydrangeas.
Next, tuck several purple lavender stems behind and between the flowers, letting them rise slightly above the hydrangeas for a relaxed, garden-picked look.
Finish with eucalyptus and assorted green foliage around the edges to give the bouquet a natural, slightly overflowing shape.
Place your finished pitcher on a rustic wooden table or bench. For a cozy summer cottage look, pair it with a simple striped linen towel and a few potted herbs.
Keep the arrangement out of harsh direct sunlight, refresh the water regularly, and remove fading flowers as needed.
Vintage Galvanized Tub Summer Planter

Give an old galvanized metal tub a beautiful second life by turning it into a lush summer planter! With soft white flowers, touches of purple, and cascading greenery, this easy DIY project adds relaxed cottage charm to your porch or patio.
Materials You’ll Need
- An old oval galvanized metal tub with handles
- White petunias
- Purple flowering plants, such as lavender or salvia
- Small white flowering plants
- Dusty miller for silvery foliage
- Trailing greenery
- Quality outdoor potting mix
- Drainage supplies appropriate for the container
- Gardening gloves
- Small garden trowel
How to Make It
Start by cleaning your old galvanized tub and checking it for sharp edges or rust damage. Make sure excess water can drain safely before planting.
Fill the container with outdoor potting mix, leaving enough room for the plants' root balls.
Arrange the white petunias toward the front and center, creating a soft, full display. Add the taller purple flowering plants toward the back to give the arrangement height and contrast.
Tuck smaller white flowers between the larger blooms and add dusty miller near the front for its beautiful silvery leaves.
Finish by placing trailing greenery around the edges, allowing the stems to spill naturally over the sides of the metal tub.
Water thoroughly, allow excess water to drain, and place the finished planter where the selected plants receive suitable sunlight. Check the soil regularly, especially during hot summer days.
Vintage Watering Can Flower Arrangement

Give an old galvanized watering can a beautiful second life by transforming it into a charming summer flower arrangement! This simple DIY project combines fresh garden blooms, vintage character, and natural greenery to create a lovely cottage-style decoration for your home.
Materials You’ll Need
- An old galvanized metal watering can
- Fresh white hydrangeas
- White daisies with yellow centers
- Purple lavender or similar flowering stems
- Small, delicate white flowers, such as Queen Anne's lace
- Eucalyptus branches
- Assorted fresh garden greenery
- Garden scissors or pruning shears
- Clean water
- A watertight container insert, if needed
How to Make It
Start by cleaning your vintage watering can and checking for leaks. If it isn't watertight, place a small waterproof container inside to hold the flowers and water.
Trim the flower stems at an angle and remove any leaves that would sit below the waterline.
Begin with the white hydrangeas, positioning them near the center and front to create a soft, full arrangement.
Add white daisies throughout the bouquet, allowing their cheerful yellow centers to stand out against the larger hydrangea blooms.
Next, tuck purple lavender stems toward the back, letting them rise above the white flowers to create height and a beautiful contrast.
Fill the remaining spaces with delicate white flowers, eucalyptus, and fresh greenery. Allow a few leafy branches to extend naturally beyond the edges for a relaxed, freshly gathered garden look.
Display your finished arrangement on an old wooden dresser or sideboard. Pair it with a few vintage books, a small potted plant, or botanical artwork for an effortlessly charming cottage-style vignette.
Keep the flowers away from direct sunlight and heat, refresh the water regularly, and remove any fading stems.
Pressed Flower Window Hanging
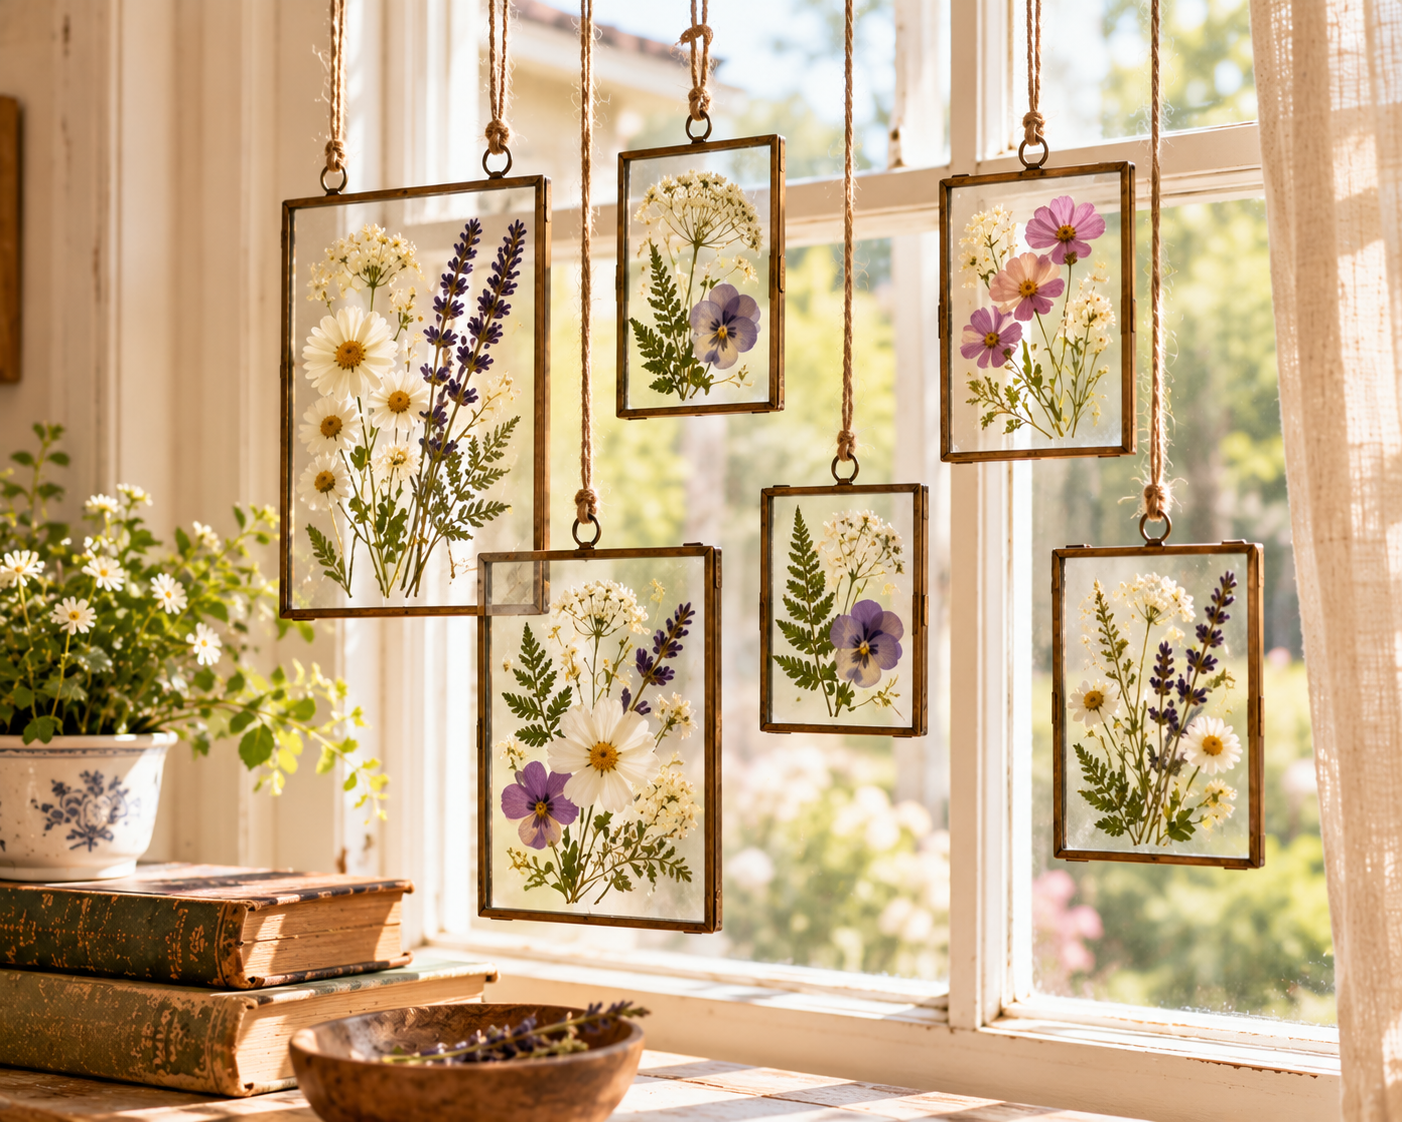
Turn delicate summer flowers into beautiful hanging botanical art! This charming DIY project preserves the beauty of garden blooms inside vintage-style glass frames, creating a lovely window display that catches the natural light and adds a soft cottage-inspired touch to your home.
Materials You’ll Need
- 6 small rectangular glass frames with antique brass-colored metal edges and hanging rings
- Pressed white daisies with yellow centers
- Pressed purple lavender
- Pressed pink and purple flowers, such as cosmos and violas
- Pressed small white flowers
- Pressed fern leaves
- Natural jute twine
- Scissors
- Heavy books and absorbent paper for pressing flowers
- Small tweezers
- Clear, acid-free adhesive dots (optional)
- Secure window-area hooks or mounting hardware
How to Make It
Start by gathering small flowers and delicate leaves from your garden. Place them between sheets of absorbent paper inside a heavy book, keeping the petals and stems as flat as possible. Leave them to dry completely, changing the paper if it becomes damp.
Once your flowers are fully pressed and dry, carefully open your glass frames.
Arrange the flowers between the glass panels, creating six different botanical compositions. Mix white daisies with purple lavender, delicate pink blooms, tiny white flowers, and green fern leaves.
Use tweezers to position the smaller pieces. If necessary, secure them with tiny acid-free adhesive dots before closing the frames.
Cut six lengths of natural jute twine and tie each one securely to the hanging ring at the top of a frame.
Hang the frames at different heights in front of a bright window, leaving enough space between them so each floral arrangement can be admired individually. Attach the twine to securely installed hooks above the window, keeping the display clear of moving window parts.
For a charming cottage look, combine larger and smaller rectangular frames with slightly different flower arrangements.
To help preserve the colors of your pressed flowers, choose a window with gentle, indirect light rather than prolonged direct sunlight.
Vintage Wooden Crate Herb Garden

Give an old w7ooden crate a charming second life by turning it into a miniature indoor herb garden! With a few terracotta pots and fresh herbs, you can create a beautiful, practical display that brings natural farmhouse charm into your kitchen.
Materials You’ll Need
- An old rectangular wooden crate
- 3 small terracotta pots with drainage holes
- Fresh basil
- Fresh rosemary
- Fresh thyme
- Quality potting mix suitable for herbs
- Small waterproof saucers or a removable waterproof tray
- Decorative moss (optional)
- Natural jute twine
- Garden scissors
- A small garden trowel
How to Make It
Start by cleaning your old wooden crate and checking for loose nails, splinters, or rough edges. Lightly sand any unfinished wood that needs smoothing, taking appropriate precautions with old painted surfaces.
Place three small waterproof saucers or a removable waterproof tray inside the crate to protect the wood from moisture.
Fill your terracotta pots with fresh potting mix, leaving enough room for the herbs.
Plant basil in the first pot, rosemary in the center, and thyme in the third. Gently firm the soil around each plant without packing it too tightly.
Arrange the three pots side by side inside the wooden crate, allowing the herbs to grow naturally above the edges.
For a rustic finishing touch, add a little decorative moss around the exposed soil, keeping it away from the plant stems and allowing the soil to dry appropriately.
Place your finished herb garden near a bright kitchen window where the plants can receive suitable light. Water each herb according to its individual needs, letting excess water drain before returning the pots to the crate.
Display the crate on a wooden kitchen table or countertop with a simple striped linen towel for an inviting farmhouse look.
A Little Creativity Makes Summer More Beautiful
You don't need expensive decorations or brand-new supplies to give your home a fresh summer feel. Sometimes, the most beautiful details come from forgotten treasures, leftover materials, and a little imagination.
Whether you're transforming an old window frame, creating handmade floral art, or giving vintage finds a second life, these seven DIY projects prove that simple touches can make a home feel warm, personal, and inviting.
So before you throw something away, take another look — it might be the perfect starting point for your next summer project!